


I am excited to share this dresser re-do with you! I mentioned in my chalk paint post here, I was refurbishing a dresser for my guest room. I found this dresser at an antique shop in Beaufort, NC back in July. I stumbled into a shop off of front street to kill sometime before dinner and found this beauty. It is solid oak and was discounted to $190 (I think it was originally $250) and I scored an additionally 10% off by paying in cash.

I really liked the detail on the top and sides of the dresser. It was in pretty good shape and it wasn’t wonky.


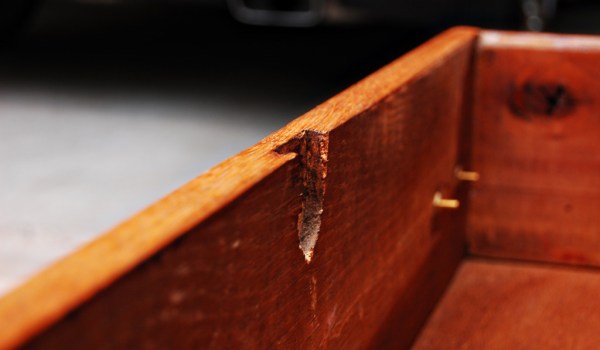
It had nice dove tailed drawers and a key hole detail on the front of the drawers. One of the key hole backings was missing from the 2nd drawer, but it wasn’t a deal breaker for me.

I got it up to my house in the Triangle a couple of weeks after I bought it. I removed all of the hardware and plugged up the holes. I prefer drawers that have only one pull on the front. It is much easier to open when you have stuff in one arm. You don’t have to have both arms free to open the drawer.
I used this wood filler to close up the holes. All you need to do is take a small amount on a putty knife and scrape it across the holes until they’re filled/covered. Wait 24 hours for it to dry and then sand it down with fine sand paper (I used 150 grit) and then repeat with some more wood filler. It usually takes a couple of layers to get it smoothed out so you don’t have a raised bubble on your drawer front.

In between filling the drawers I stared sanding the top. My vision for this dresser was a dark stained top with ombré drawers. I used an electric sander and 60 grit sand paper to remove the old stain. Once the stain was removed I used 400 grit sand paper to get the top as smooth as a baby’s bottom! (I wish you could reach out and touch the top to feel how smooth it is!)

I taped off the part of the dresser that I wanted to paint and applied this dark walnut stain with an old t-shirt. (I bought the 1/2 pint can.) It was super easy. I worked in small sections and let the stain sit on the top for a couple of minutes before wiping it off with a clean rag. I let the first coat dry for about 5 hours and then put a second coat on. I was hesitant to let the stain sit on there too long before wiping it off, so the original coat wasn’t quite dark enough for me.
Next I painted the base and the drawers. I did this inside in the A/C. Chalk paint doesn’t work too well in the hot humid summer temps, and since it is odorless I didn’t have a problem using it inside.
I used the “Pure White” and “French Linen” chalk paint colors for the base. For the first drawer I combined 1 part Pure White with 1 Part French Linen. I used 50ml of each. I wanted to be sure I had enough to cover the drawer and that I would not have to measure it again.

After two coats on the top drawer, I added 25ml of French Linen to the remaining paint mixture from the top drawer. This didn’t provide enough contrast from the top drawer, so I poured in a little more French Linen. (I was planning on having specific and exact measurements for the mixed color on each drawer, but I ended up just mixing enough until the contrast looked right to me. This was a great exercise for my perfectionstic side!) For the last drawer I added even more French Linen to the remaining paint mixture from drawer number 2. I then painted the base a nice off-white color. I added some of the pure white to the left-over French Linen mixture from the third drawer until it was light enough for me. My goal was for the base to be a light color that was NOT stark white.

After the base and drawers were painted I applied 2 coats of clear wax to protect the finish. Annie Sloan makes her own wax brush, but it’s almost $30. I found this one on amazon (also in the picture below) for half the price! Applying the wax can be very tricky. A little goes a long way. I usually just scoop out some onto a paper plate to work with. This prevents it from drying out and from contaminating the whole container as sometimes the wax can become discolored from the paint on the piece of furniture. Apply the wax in a thin layer and go with the grain. Work in small sections. After you cover a small section use a lint free cloths to wipe away the excess. You can tell when you’ve wiped enough of the wax away by dragging your finger over the area. If your finger leaves a trail, you need to wipe more off of the surface. I put two coats of wax on this piece. On flat surfaces that will see a lot of use you will definitely want to put more coats of wax to protect the paint/stain. Make sure to allow the wax to dry at least 24 hours before applying another coat. After you apply the last coat and it’s dried, you can then buff the wax to get a nice clean sheen. Basically you rub the surface vigorously until you see the texture change to a clear sheen.

Next I added new hardware and painted the key-hole detail hardware to match the new finish. I was originally contemplating getting some of these hepplewhite drawer pulls, but after looking at the prices, I went another direction. I saw the drawer pulls below at Lowe’s, and they were on sale; only $2.98 (originally $4.98)!

I painted the key-hole detail in this dark pewter metallic color and finished them off with a clear satin coat to prevent chipping. (I originally painted the key-hole hardware with a nickel finish metallic paint, but it definitely did not match and looked awful next to the pewter pulls).

I was very excited about how this dresser project turned out. A lot of the painting was flying by the seat of my pants in terms of color mixing, but I think the dresser looks good with the combination of the dark walnut stained top, the light colored base and the ombré style drawers! Here it is in my guest room, ready for storage.


This is so beautiful!! You did an amazing job and I love the ombré effect.